 Hindsight
Getting started with Hindsight
Hindsight lives in your menu bar. Choose to track manually or automatically during setup, then open the main window to see your day.
What you need
A Mac with macOS 26 or later. There is no account to create. Everything Hindsight records is stored on your Mac.
Step 1: Run setup
- Open Hindsight. Its icon appears in the menu bar and Welcome to Hindsight opens.
- Choose how to track. To track manually, you can skip the permission and model steps entirely.
- For automatic tracking, grant Screen Recording when asked, then pick a Vision Engine: Apple's on-device analysis if your Mac offers it, or Use my own model instead for an OpenAI-compatible endpoint. Running a local server? fills in Ollama or LM Studio for you.
- Finish on You’re all set. You can change any of this later in Settings → AI Engine.
Step 2: Start tracking
Click the menu bar icon and choose Start Tracking. To start every time you log in, turn on Launch at login and Start tracking automatically in Settings → General, under Automation & Startup.
A new session needs a few captures before the first activity appears. Give it a minute or two.
Step 3: Find your way around
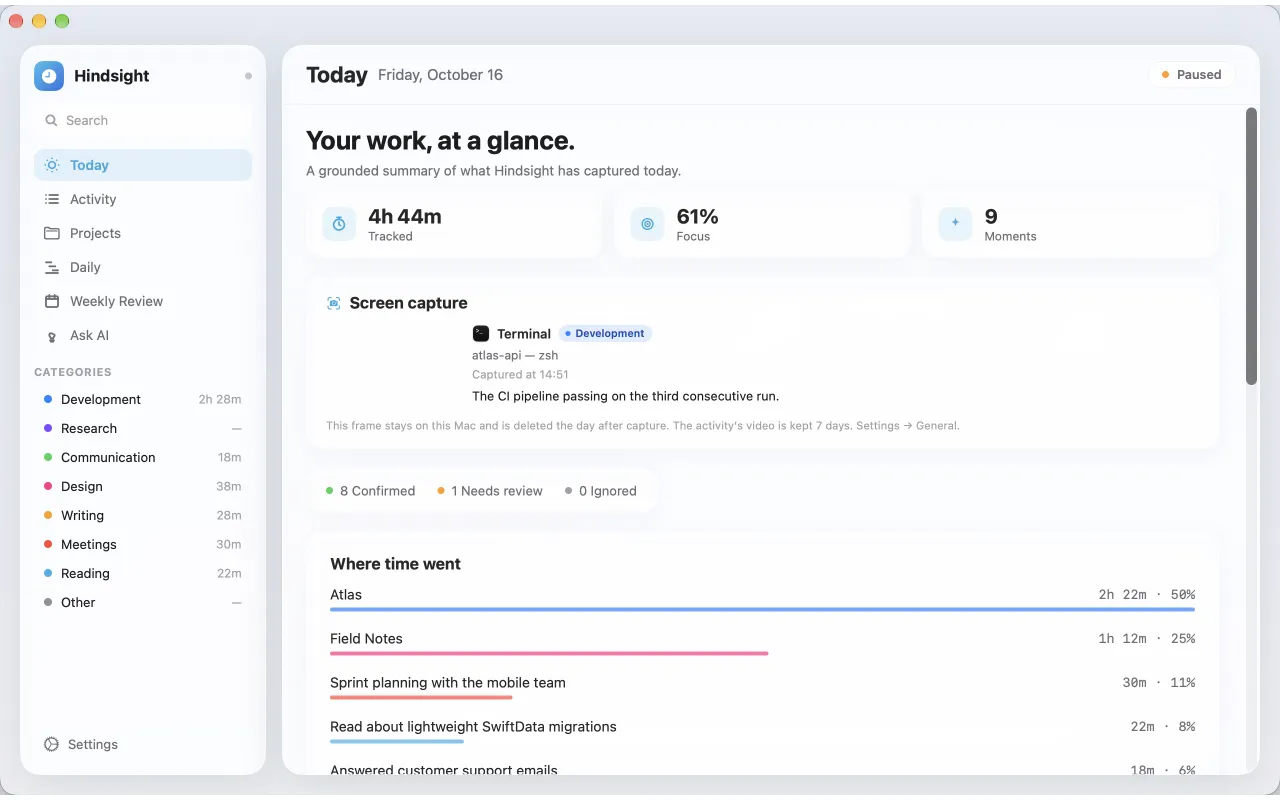
Open the main window from the menu bar. The sidebar has:
- Today: tracked time, focus, moments, where the time went, and anything that needs review.
- Activity: every activity with its start and end time, as cards or a timeline.
- Projects: time and activities per project.
- Daily: one day at a time, by category and project, with your standup.
- Weekly Review: the week's work, with totals and export.
- Ask AI: questions about your own workday.
Nothing showing up? If the menu bar offers Start Tracking, tracking is off. If activities keep coming back as unclear, test your vision endpoint in Settings → AI Engine.
Still stuck? Email [email protected] and we will help.